During the steering gearbox removal I noticed that the rear engine mount was torn.
The engine and gearbox is held by 5 mounts in place. The rear engine mount is the most important of them. This was the explanation for the violent engine movement during high rpm engine output when going on and off the throttle. I had been experiencing this issue since the car purchase.
After removing the steering gearbox, the access to the rear engine mount was very easy. At first I had decided to simply buy a new one, but then I read many posts on successful repair using a polyurethane of various stiffness. A simple replacement of the torn mount was not satisfactory solution because I also wanted to make the mounts a little bit stiffer to improve the engine-to-wheel-to-road power transfer and response.
For the repair of torn mount I have used a polyurethane 50A Shore. The number 50A Shore is a stiffness parameter, the bigger the number the more stiffness you get. I poured the polyurethane into the torn mount and let it dry for a 2 weeks or so.
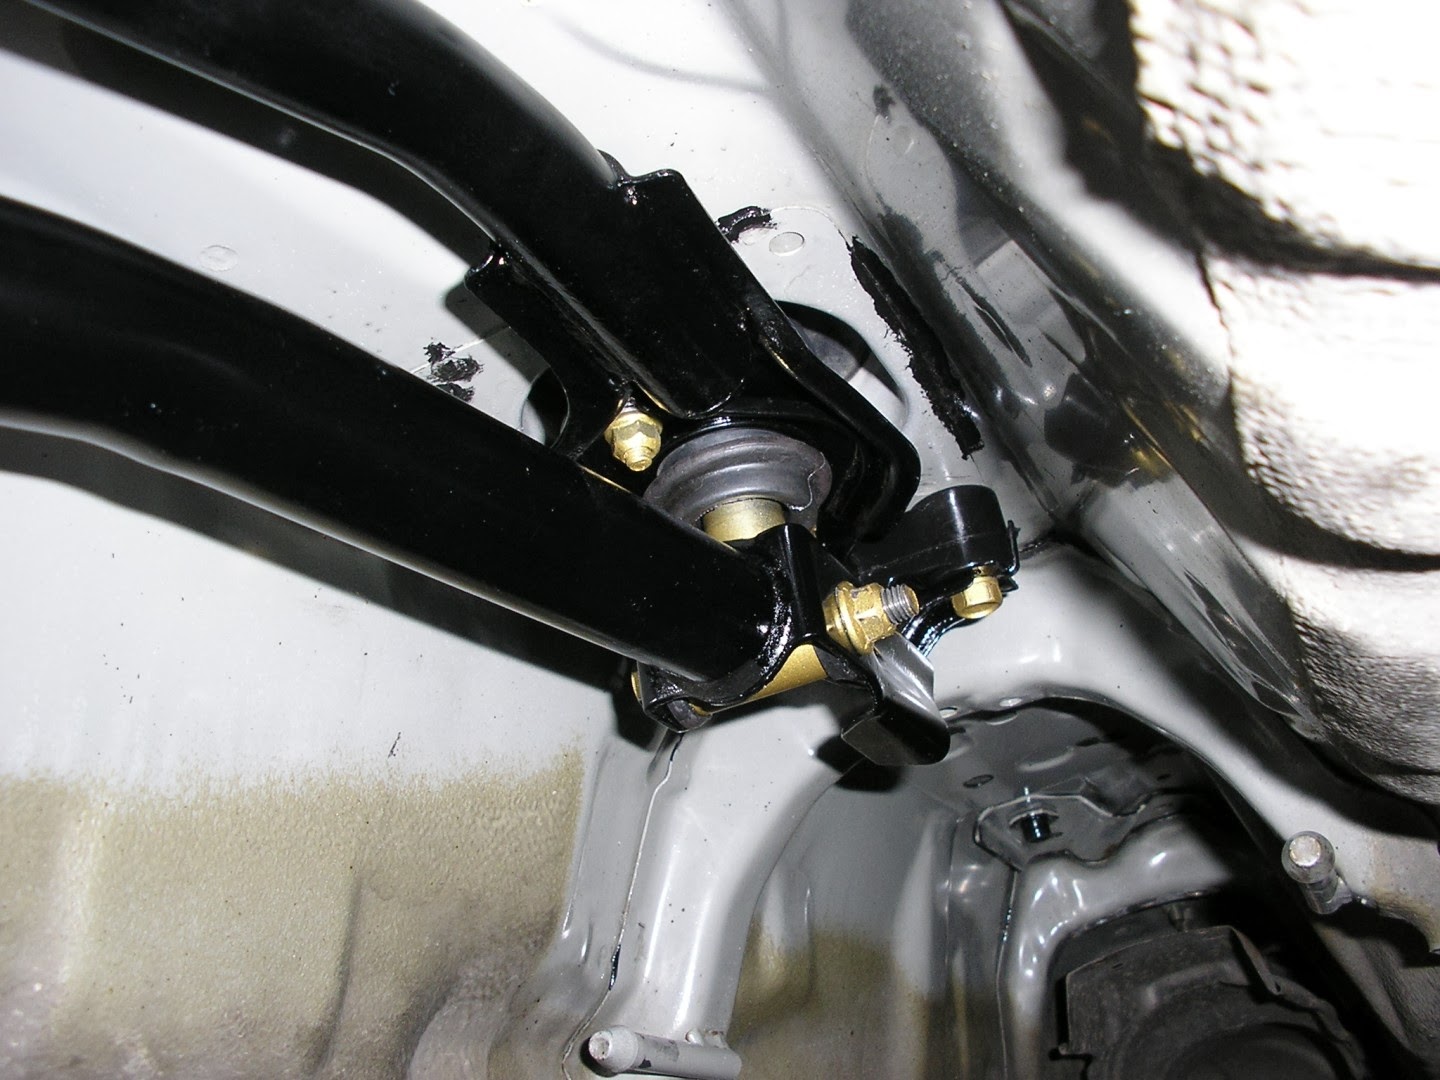
 |
| Repaired rear engine mount. |
Using the same polyurethane, I have also made the two front lower engine mounts stiffer, but after the engine running tests I found out that it was too much of shaking in the interior. Now I am using only the rear engine mount and the front lower engine mount on the passenger side, reinforced with the polyurethane. I gutted the polyurethane from the front lower engine mount on the driver side and put it back to stock condition. This combination is not as much violent in terms of vibrations and still prevents the engine from movement.
 |
The front lower engine mount filled
with polyurethane. |
During this time I noticed some rust on the gearbox rods and decided to repaint it. If you don't have the appropriate tools for removal of the so called "bitch" pin from the rod, then be prepared for hard times removing it. Using a wire brush, rust converter and black spray paint the results looked like this:
 |
| Overhauled rods. |
In the process of removal of the bitch pin, the rod boot got torn. I have purchased a new one from Honda and for additional 2 Euro I have got the new bitch pin as well, although it was not necessary.
 |
| The rod boot and bitch pin. |
I have also purchased a set of Energy Suspension ES polyurethane bushings for the gear rods. Well they are stiffer and make the shifting more crisp but in my case the big round bushing caused the gear lever to resonate like mad during high rpm, therefore I swapped back the original rubber bushing.
 |
| Gear rod ES polyurethane bushings. |
After putting the rods back together:
Overhauled shift rods.
The titanium shift knob had a lot of dirt trapped in the lettered grooves. Simple tooth brush did the cleaning job very well.
 |
| Cleaned titanium shift knob. |


No comments:
Post a Comment